How To Get Your Own Contact Management System
•Download as PPT, PDF•
1 like•1,474 views

Join www.GEANetwork.com and get your own Contact Management System in 3 easy steps!

Recommended
More Related Content
What's hot
What's hot (15)
Similar to How To Get Your Own Contact Management System
Similar to How To Get Your Own Contact Management System (20)
More from Val Slastnikov
More from Val Slastnikov (20)
Recently uploaded
Recently uploaded (20)
How To Get Your Own Contact Management System
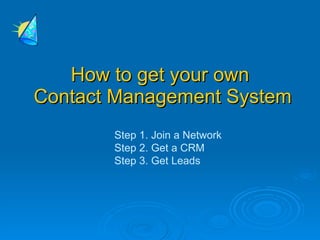
- 1. How to get your own Contact Management System Step 1. Join a Network Step 2. Get a CRM Step 3. Get Leads
- 2. Example 1: 1. Join Windows Live Network 2. Get Microsoft Dynamics CRM 3. Get GEA Leads
- 3. Step One Join Windows Live Network
- 4. Step Two Get Microsoft Dynamics CRM
- 5. Step Three Get GEA Leads
- 6. Step One Join Windows Live Network
- 7. How To Join Windows Live The best part is, most of you are already a part of Windows Live Network, even if you were not aware of it. However, if you haven’t joined Windows Live yet, it is very easy to join it. Here’s how:
- 8. How To Join Windows Live Go to: WindowsLive.com and click the tab “How It Works” That page will explain to you everything that you need to know about your Windows Live ID and why it is good to have it
- 9. How To Join Windows Live I only want to mention one major reason: You need to have your own Windows Live ID, in order to access Microsoft Dynamics CRM with all of your Customer Records that we will store for you in there. So, the sooner you get your own Windows Live ID, the sooner you will be able to get to your prospects and start creating your own campaigns
- 10. How To Join Windows Live So, as soon as you finish reading the page on How To Use Windows Live, you should click on the tab “Get your own Windows Live ID” and fill out the form when you get to this page:
- 11. Step Two Get Microsoft Dynamics CRM
- 12. How To Get Microsoft Dynamics CRM Once you fill out the form and get your own Windows Live ID, you need to go to one of Microsoft Dynamics CRM websites and sign up for 30 day Free Trial. You can sign up for the Free Trial at one of the following websites: www.microsoft.com/dynamics (USA) or www.microsoft.com/canada/dynamics (Canada - English) or www.microsoft.com/canada/fr/smb/products/dynamics.mspx (Canada - French) Or, you can type “Microsoft Dynamics CRM Online Sign-up” in your browser window, and you will be forwarded to the Free Trial sign-up page
- 13. How To Get Microsoft Dynamics CRM This is what the page will look like when you arrive there:
- 14. How To Get Microsoft Dynamics CRM At first, you need to select your country from the drop-down menu, and click “Next”:
- 15. How To Get Microsoft Dynamics CRM The next page will prompt you to enter a combination of characters (letters and numbers), so you must enter them exactly as you see them and click “Next”:
- 16. How To Get Microsoft Dynamics CRM The next page will bring you to a page that gives you two options – either Sign In using your Windows Live ID or Go and Get your own Windows Live ID. Since you already have your own Windows Live ID by now – go ahead, enter your Username and Password that you received from Microsoft and click “Sign In”: 1 Sign In
- 17. How To Get Microsoft Dynamics CRM The next page will give you an opportunity to choose the type of your Subscription and number of user licenses. Since this is only a demo version, go ahead and select “Microsoft Dynamics CRM Online Professional Trial” with 5 licenses and click “Next”: 2 Subscription
- 18. How To Get Microsoft Dynamics CRM You can enter your Company Name and create its CRM Web Address on the next page and check if the name you’ve selected is available. If it is, enter the details of your organization, as suggested and click “Next”. If not, try to tweak it until it gets accepted: 3 Organization Details
- 19. Inside Microsoft Dynamics CRM Once you finish the Sign Up process, you will be able to access the database and see the first page on the inside that looks like this:
- 20. This concludes Step Two Congratulations! Now you are a Member of Microsoft Dynamics CRM Online!
- 21. Step Three Get GEA Leads
- 22. 3 Steps to Install GEA Leads into your CRM Let’s pick up where we left off – with the Get Started page inside your CRM that looks like this:
- 23. 3 Steps to Install GEA Leads into your CRM First, we recommend that you install CRM for your Outlook. This way, you would be able to do campaigns without having to log into your online CRM account every time: 1 Work with CRM for Outlook
- 24. Step 1. Download and install CRM for Outlook Once you click on Download and install link in Step 1 of Get Started page, you will be forwarded to the Microsoft download page that looks like this:
- 25. Step 1. Download and install CRM for Outlook Scroll down the page and make sure to install the following 2 files:
- 26. Step 1 of “Get Started” Once you download both files, click on First steps link to review how to configure your CRM for Outlook and what to do next. Some steps are easy and you may complete them on your own: 1 First steps
- 27. Step 1 of “Get Started” Other steps might require help of the CRM administrator or an advanced CRM user. Please feel free to contact crm@digitizergroup.com for support: 1 First steps
- 28. Step 2. Add your data We recommend that, unless you are an “advanced” user or an administrator, you should skip this step altogether for now (you can always get back to it later) and proceed straight to Step 3:
- 29. Step 3. Invite your people Click on the link Video: Invite your team in Step 3 and watch a short video on how to invite our Administrator to join your database, so that we could upload Canadian and U.S. Leads into your database and help you with any other administrative tasks:
- 30. Step 3. Invite your people All you need to do is create a user with the name “CRM Administrator” and email address crm@digitizergroup.com Then you can invite that user to join your database and we will be able to start uploading the GEA Leads for you right away.
- 31. This concludes Step Three Congratulations! Now you are ready to start getting GEA Leads and create your own Sales and Marketing Campaigns!