Paper making simplified
•
6 gefällt mir•10,476 views

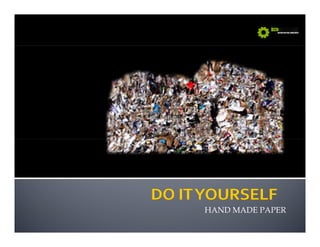
Paper making simplified Making paper at home wth hand made make it yourself paper making, from waste to paper, paper making , Do it yourself. Industry and businesses provide almost half the amount of recovered paper in the form of cuttings/shavings and unsold newspapers/magazines. Households contribute over a third. Almost any household paper, including used newspapers, cardboard, packaging, stationery, direct mail, magazines, catalogues, greeting cards and wrapping paper, can be recycled. Recovered paper compares favorably with the production of wood-based pulp made by chemical or mechanical means in terms of environmental pollution and energy consumption.

Empfohlen
Empfohlen
Weitere ähnliche Inhalte
Was ist angesagt?
Was ist angesagt? (20)
Andere mochten auch
Andere mochten auch (20)
Ähnlich wie Paper making simplified
Ähnlich wie Paper making simplified (20)
Mehr von Centre for Application of renewable Energy
Mehr von Centre for Application of renewable Energy (16)
Kürzlich hochgeladen
Kürzlich hochgeladen (20)
Paper making simplified
- 2. Industry and businesses provide almost half the amount of recovered paper in the form of cuttings/shavings and unsold newspapers/magazines. Households contribute over a third. Almost any household paper, including used newspapers, cardboard, packaging, stationery, direct mail, magazines, catalogues, greeting cards and wrapping paper, can be recycled. Recovered paper compares favorably with the production of wood-based pulp made by chemical or mechanical means in terms of environmental pollution and energy consumption consumption. Email :care@ecomachines.in home page www.ecomachines.in
- 3. The milk and juice cartons that you normally throw in the waste-bin can also be recycled. Cartons are made from 75% paper, 20% plastic (polyethylene) and 5% aluminum foil. Because of this amalgamation of materials, they cannot be recycled along with ordinary paper. They can be reprocessed into other items or incinerated to produce energy. Email :care@ecomachines.in home page www.ecomachines.in
- 4. Now a paper recycling plant is available that enables you to recycle paper and make your own stationery or paper gift items at home. This technology is so uncomplicated that even a child can try his hand at it. A few schools in Delhi, India, have installed this paper recycling plant where students are trained in making paper products like folders, penholders, material for display board, lampshades, teaching/learning aids, etc. This enables them to make their own cards, files, folders, invitation cards and certificates for school. Email :care@ecomachines.in home page www.ecomachines.in
- 5. • Office white paper • Newspapers •• Magazines, • Telephone directories a • Pamphlets. • Cardboard • Mixed or colored paper • Computer print out paper Email :care@ecomachines.in home page www.ecomachines.in
- 6. Email :care@ecomachines.in home page www.ecomachines.in
- 7. • Scrap paper from junk mail, catalogs, or magazines, torn into small pieces. Avoid using newsprint; when it's beaten it turns into a gray mush and produces an unattractive sheet of low-quality paper. • A food blender (often available in thrift stores). • A mould (a frame to which a fine mesh screen has been attached). • A deckle (a frame that mates with the one used for the mould, but which has no ) screen). If a mould and deckle is not l bl available, h then you can use a fl flat sieve ( ('h l chalni' in h d) hindi). ll It'll serve the same purpose. • A large plastic tub that holds the pulp. • Pieces of muslin cloth, each cut a bit larger than the sheet size. These will be used for couching as well as iron the paper. • Two plastic or waterproofed plywood boards (for pressing formed sheets). • An iron Email :care@ecomachines.in home page www.ecomachines.in iron.
- 8. Step 1 Tear or cut the scrap paper into small pieces. Soak the pieces of scrap paper in a bowl or pail over night. Step 2 Put the scrap paper (about one part paper to five parts water) into the blender and secure the lid tightly. Then blend the mixture in short bursts. Turn off the machine from time to time and check to make sure the pulp is not collecting around the blade. Step 3 When the consistency of the fibers in the water is even, dump the beaten paper fibres in a bowl and repeat Step 2 a few times, till you have enough pulp to fill a quarter of a bucket. To make the end result more interesting, poster colours can be added to the pulp. Also you can add flower petals petals, pieces of glitter glitter....anything of your interest which makes the paper more fun to make. Email :care@ecomachines.in home page www.ecomachines.in
- 9. Step 4 Fill the vat/ plastic tub half full with water . Now add pulp from your stock supply, until you have enough to create a good sheet (three or four cups of pulp dispersed in the water). The more pulp you add to the water, the thicker the final sheet. Mix the pulp with your hand, until it has mixed evenly. Step 5 Wet the mould and deckle. Then, holding the deckle on p top of the mould ( in contact with h h d ) h d h b k f the wire mesh side), reach toward the back of the vat and, in one continuous motion, pull the mould and deckle under the surface and up again, catching an even layer of pulp on the surface of the mould. Step 6 As you pull the mould and deckle upward, keep the deckle tight and very gently move the pulp on the surface of the mould left and right and back, then away and toward yourself and back You are forming the sheet at this step an back. step, action that should last only a few seconds. Email :care@ecomachines.in home page www.ecomachines.in
- 10. Step 7 Let the water drain from the wet pulp for about fifteen seconds. Then remove the deckle and let the water continue to drain. Now transfer the layer of pulp on the mould onto the piece of muslin by rolling it gently across the surface of the cloth. This is called ‘couching'. Step 8 Continue to make sheets by repeating Steps 5 through 7, by placing down a piece of muslin, then a sheet of paper, then a muslin, etc., building up a stack of sheets. Finish by putting a muslin cloth on top. Email :care@ecomachines.in home page www.ecomachines.in
- 11. Step 9 After you have make a stack of sheets, place the muslin and sheets of pulp between two hard plastic or plywood boards and remove the water by putting weight on the top. You can use either a mechanical press, place several bricks on top of the pile, or even carefully stand on the pile until the water in the pulp is squeezed into the absorbent blankets and the sheets are flat. Step 10 After most of the water is squeezed out of the pile, separate each set of the damp sheet and the muslin on which it is Email :care@ecomachines.in home page www.ecomachines.in couched.
- 12. Step 11 Place another piece of muslin on the damp paper sheet and iron the sheet of paper between the two pieces of cloth until it is dry. Step 12 When the sheet appears to be dry, peel it from the muslin it was couched on and place it in an old book and place the book under a heavy weight to absorb whatever water might remain in the sheet. This will help cut down on the wrinkling. The next day, your sheets of paper will be ready to write on, cut into shapes, or whatever your imagination can come up with Email :care@ecomachines.in home page www.ecomachines.in
- 13. Email :care@ecomachines.in home page www.ecomachines.in